
How to Replace Sealant Like a Pro – Simple DIY Kit for Beginners
- staffswfts
- Jun 6, 2025
- 2 min read
Updated: Feb 5
🔧 Step-by-Step Silicone Sealing Tips
1. Remove Old Sealant
Use a sharp retractable knife to carefully cut away and remove any old or mouldy silicone. Ensure the joint is completely clear before applying new sealant for proper adhesion.
2. Clean the Surface Thoroughly
Use the included surface cleaning wipes to remove soap scum, grease, dust, or residue. Silicone will not bond properly to dirty or damp surfaces. Allow the area to fully dry before proceeding.
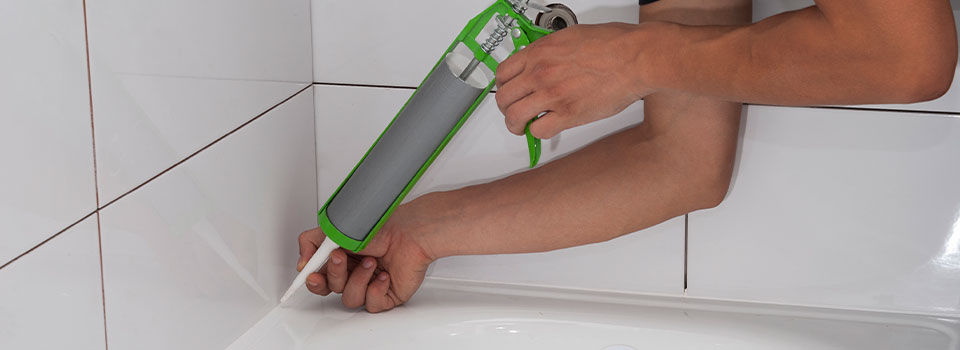
3. Load the Caulking Gun
Insert the silicone tube into the caulking gun. Cut the nozzle at a 45° angle to suit the joint size and puncture the inner seal if required.
4. Apply the Sealant Smoothly
Hold the gun at a slight angle and apply steady pressure. Move in one continuous motion to lay a smooth, even bead along the joint.
5. Tool the Joint Immediately
Use the included finishing tool to smooth and shape the silicone. Do this within a few minutes before the sealant starts to skin over.
6. Allow to Cure
Leave the sealant to cure fully before exposing it to water. Refer to the silicone manufacturer’s instructions for recommended curing times.
💡 Pro Tips
Don’t apply silicone in a cold or humid room — it won’t cure properly.
Always wear gloves (included!) to keep hands clean and avoid smudges.
For best results, leave the silicone to dry for 24 hours before using the area.
✅ Why Use Our Pro Caulking & Silicone Sealant Kit?
Premium mold-resistant silicone
Easy-to-use caulking gun and finishing tool
Step-by-step instructions included
Perfect for beginners and pros alike
👉 Ready to seal like a pro?Shop the Pro Caulking & Sealant Kit Now →

Comments